Transitions are used to join two video or audio clips smoothly, avoiding a sudden jump. This section describes basic operations with transitions; a complete list of all transitions is given in a separate part of this documentation.
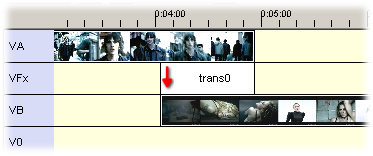
A transition can be placed on the VFx track between two overlapping video objects, or on the AFx track between two overlapping audio objects:

Select the item from the menu. Choose a particular transition from the list, then select the position on timeline where it should be placed (the cursor shape indicates permissible places; right-click can be used to cancel the action).
The transition is created and its size is set so that it covers exactly the time interval in which the two objects overlap; you can adjust the size by dragging the left or right border of the transition object.
An unneeded transition can be deleted in the same way as any other object (using ).
Each time you select a transition object, the object panel changes to the following form:

The panel informs you about the current transition type; you can change it by double-clicking an item in the Available transitions list.
The two buttons with arrows can be used to change the transition direction, i.e. whether it should start with object from track A and finish with the object from track B, or vice versa. OpenVIP editor usually sets the correct direction automatically; you have to switch it manually only to achieve unusual effects.
The last button opens the dialog which is described in the next subsection.
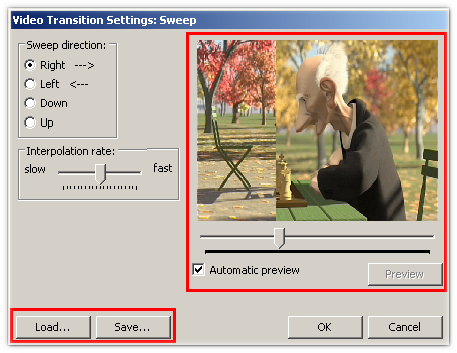
Each transition has its own specific dialog which allows you to adjust its parameters. As in the case of filters, all transitions settings dialogs have a few controls in common:

Every dialog posesses a pair of / buttons which can be used to save the current transition settings to a XML file and recover them at a later time.
The settings dialogs of video transitions also contain a small preview image. In case you keep the Auto preview checkbox turned on, a new preview image will be generated each time you change the transition parameters; otherwise the preview is generated only when clicking the button. The slider under the image corresponds to the time position that is being previewed; the range corresponds exactly to the interval that is covered by the transition.